Feeds:
Posts
Comments

Motherhood

Motherhood


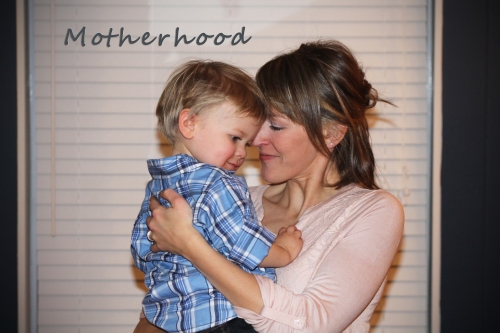
Oh, motherhood. It’s hard. I’ve been experiencing the challenging parts more often than not lately. I often wonder if I were a stay-at-home mom if my life would be easier, but I absolutely know that’s a big fat lie. It’s hard, whether you stay at home with your children or if you work outside the home. It’s just hard.


Motherhood has been completely overwhelming me these last few months. My 2-year-old is precious, cute, funny, random, and loving. However, he’s going through a stage where he loves to say “no,” grunt when he doesn’t want to do something we’ve asked, and if I’m honest, exhausting. He may not be exhausting himself, but the situations that arise because of his growing up and wanting to do things on his own are exhausting. They are especially exhausting when you’re 5 months pregnant, working almost 40hrs a week, and trying to keep up all the responsibilities of running a household.


IMG_0375


Up until this point (pregnant with #2, working outside the home, having a toddler), motherhood has been somewhat “easy.” “Easy” in the sense that I wasn’t nauseous or tired from growing another human inside my belly, “easy” because my toddler didn’t fight back (let alone make any sense when he talked), “easy” because I didn’t have to worry about feeding him a nutritious meal when he was breastfeeding, etc. Oh nursing, how I love you. Nursing my baby was/is my fondest memory of having a newborn/toddler. Lord willing, I’ll be able to nurse our new baby as long as I did with Elias, but I digress… This new stage of motherhood, raising a toddler, is a different kind of exhaustion. Not the “I’ve-been-up-all-night-feeding-changing diapers-then-get-up-and-do-it-all-again” exhaustion, but the mental exhaustion of trying to reason with a 2-year-old. I now understand why moms try to bribe their child with M&M’s so they can (still) struggle with trying to trim their child’s toenails that are a mile long. I understand why mom’s end up making their child the same meal night after night because they know it’s the only thing they’ll eat that’s relatively “healthy” (organic Mac ‘n Cheese and peas anyone?). Or why they would give their child a less than nutritious breakfast “treat” just so they can stop crying because you have to get out the door or else you’ll be late for work. I totally get these things now. Who knew I’d be that mom. You gotta do whatcha gotta to do to keep your head above the water. You’ll do anything to try to survive another day looking somewhat presentable.


And don’t worry, we do discipline our child, but staying consistent at that is challenging as well. You know you should put your child in a time out when you ask him to follow you to the bathroom to take a bath and he would rather walk (or run) around the house yelling, “I’m naked! I’m naked!” But while he’s totally being disobedient, it’s the cutest thing for two young parents to witness. When do you draw the line of having fun and teaching your child to be obedient?


I don’t say all this to complain, I love my little man and I truly LOVE being a mom! I’m just sharing my weary heart and that the real life moments of motherhood can and will be really hard. It’s hard to the point where you want to raise your hands and say, “I give up!” and then go grab a cookie, or two, or three. I look at my mom; she (and my dad) raised four babies! Four! Guys, I’m struggling to get my child to take a bath, something he doesn’t like, once a week and when we get two baths in a week that’s totally a victory in my book! I sit back and I’m amazed at how my mom did it. What a great role model for me to look up to.


IMG_0336


When it comes down to it, what God is teaching me over and over and over again, is that I need to run to Jesus MORE in those moments of defeat and exhaustion. No matter if it’s dealing with motherhood or just everyday struggles. It’s always about Jesus. I was reading a devotional this morning (Thrive Moms) and it was in Psalm 118.


“It is better to take refuge in the Lord than to trust in man.” vs 8

and

“Songs of Joy and Victory are sung in the camps of the godly.” vs 15

I tend to run to other things (cookies) instead of running to Jesus when I’m trying to find refuge from the exhaustion. Nothing is going to give me the “break” or the satisfaction I crave from motherhood other than Jesus. Jesus is always better. He is my True refuge. He is victorious when I make mac ’n cheese for the 2nd or 3rd night in a row. When I want to throw up my hands and say I can’t do it, He is victorious. He is victorious because I have my complete salvation, my life, in Him.


Motherhood is hard, but what a wonderful and precious gift it is. How beautiful are the moments when you ask your 2-year-old to pray and prays for mama’s belly and the baby sister in it. How sweet (and funny) it is when your child tells you that, “Jesus shakes His booty, too!” after a short dance session listening to music. Or when your child is so amazed and in awe of the moon that he exclaims, “Jesus made the moon!” Those moments absolutely 100% make all the mentally exhausting moments of motherhood totally worth it all.

I’m thankful for the refuge I can find in Jesus.

He has overcome the things I battle with daily.

What an honor it is to run to Him when I realize I just can’t do it myself.

Jesus is victorious when I am not.

Amen for His grace and His everlasting love towards me.
 

IMG_0378


It’s a New Year!

I’m on this journey called grace. My journey is to become more like Christ. My journey is to continually die to myself and my selfish wants. It’s about putting others first and investing in them. My journey is covered in Christ’s scandalous grace for me. Amen, amen, amen.
 

Will you join me in this journey, friends?


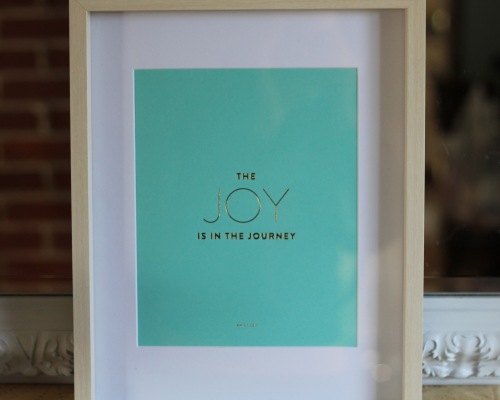
Joy in the Journey


One Word

Happy New Year!


New Year's Day Hike '11

New Year's Day Hike '11


I was reading a dear friends blog last week and she mentioned a resolution (she got this idea from her friends blog ), a non-resolution if you will, that consisted of one word. Not a pile or a list of things to hold yourself accountable to (that you’ll break by the time spring hits) but just one word that could sum up your goals for this new year.

I was challenged by this and knew I wanted to take part in it too. I already knew what I needed to work on (a whole long list of things! 🙂 ) but I needed to come up with a single word that could help me stay focused through the year. I asked God and He revealed a seemingly simple word but a word that has more power to it than people give it credit. A word that is somewhat unnatural for us to do in a very self-sufficient world that wants to do everything in its own ability. A word that would change all of our lives if we took more time to do it. A word that caused the Israelites to win battles,  that fed 4,000 people with just 7 loaves of bread, and a word that helps us have an intimate communion with God. I need more of this word.


Prayer


I want to be known as the woman who prays, who prays without ceasing, and a woman who prays in FAITH knowing that God is able!  Not just with my morning petitions to God but deep, intimate, uninterrupted conversation with Him. Prayers where I don’t rush half way through because I have to be somewhere in 30 min. Prayers where I get lost in God’s goodness. I think I’m too busy to pray at times but it’s the complete opposite: “I’m too busy NOT to pray”  <– (Insert book title that I’ve started to read 🙂 )

I know what the power of prayer can do in someone’s life. I see influential women in my life that are so faithful in their praying. I know if I leave a request in their hands it will be prayed for…whatever the outcome may be. I want to be that woman.
Prayer encompasses so many things I want to carry out this year because all of my goals need to be lifted up in PRAYER. Everything needs God’s sifting. Everything that I’m going through, that my husband, family, and friends are going through; need to be lifted in prayer.

God asks us to pray, to pray with faith that can move mountains, and to pray without ceasing.


“Be anxious for nothing, but in everything by prayer and supplication with thanksgiving let your requests be made known to God.” Philippians 4:6


“…For truly I say to you, if you have faith the size of a mustard seed, you will say to this mountain, ‘move from here to there,’ and it will move; and nothing will be impossible to you. But this kind does not go out except by prayer and fasting.”  Matthew 17:20-21


“Rejoice always; pray without ceasing; in everything give thanks; for this is God’s will for you in Christ Jesus.”  1 Thessalonians 5:16-18


I want to lay everything before God and pray through it not in my strength but in His.

What is your one word?


(I’d love to hear your thoughts!)


+


=


Sorry for my absense…I’ve been eating ice cream, brownies, ginger snaps, and candied nuts!

**********

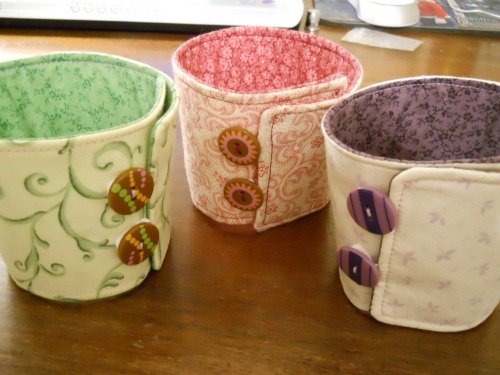
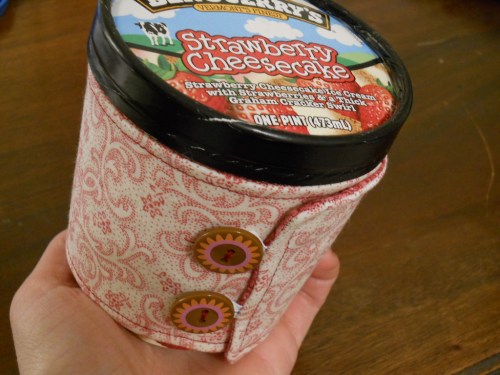
A couple of weeks ago, my sister-in-law asked if I could help her out with a stocking stuffer gift. She saw a blog post  from this place I was excited and took on the challenge! She sent me all the fabric and a “manufacturing fee” which let my buy some ice cream and a fun diy magazine!

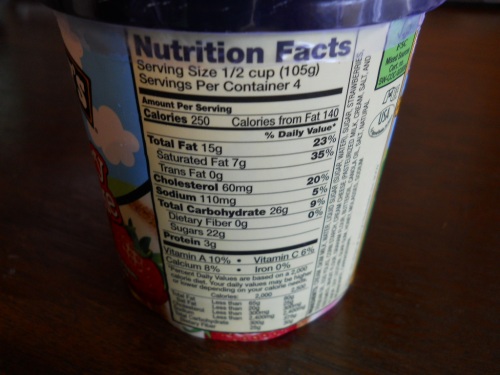
Here’s what the “manufacturing fee”  really paid for:


1000 calories

60 grams of fat

&

a very satisfied tummy 🙂


Thankfully my husband helped me polish this tub off but I’ve been known to eat a whole one of these in one sitting. That’s what watching SATC and chatting with your bff does to you!


You can check out the blog for step by step directions. They were very easy to follow!


Yum!

Infinity Scarf

This should be called Part II of my Homemade Christmas ideas. Along with the place mats I wanted to make something extra and what’s better than a scarf!

I think almost every girl loves a new scarf to help accessorize their outfits. I do! I bought some grey knit fabric on clearance back in the summer and I still hadn’t used it for anything. I thought the light weight comfy material would work well turned into a scarf. I searched all over in the craft blog world and didn’t come up with much. Don’t get me wrong, there are some pretty fantastic scarf ideas out there but nothing that jumped out at me for my sister-in-law.


Enter:


This was a very simple project.


What you’ll need:

* 1 yard fabric cut in (2) pieces, lengthwise

* Coordinating thread

….simple!


I don’t have specific step-by-step directions and I didn’t take exact measurements. This project is so simple I’ll just give you a run of how to do it.


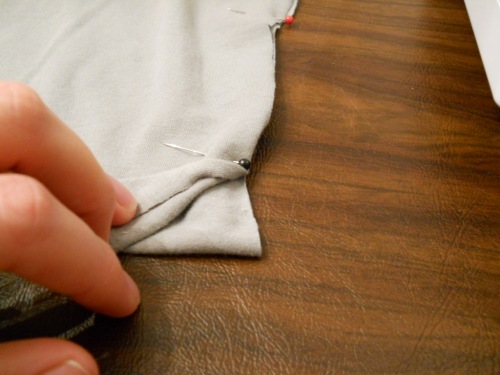
Pin the (2) pieces together that you just cut and sew at one end, creating your typical scarf when you drape it around your neck.  


Put it on and find a good length for yourself (the scarf should meet your mid to upper thighs). I had to cut roughly 20″ off from each end making the scarf roughly 60+ inches long. Approx. 30+ inches for each rectangle.

Exact measurements? Nah…you make it the length you think would fit you best.

When you find the length the suits you best sew the other end together creating a big loop. You want the scarf long enough to wrap around your neck a couple of times.

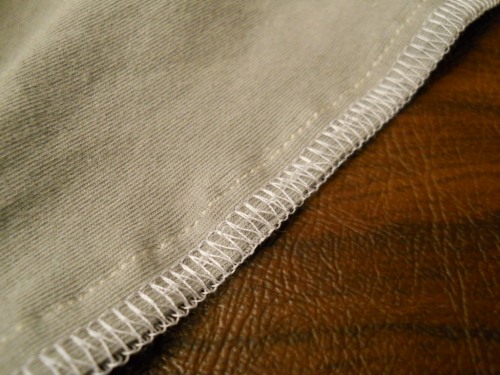
If you have a serger you and finish off the seams like this:


No serger? No problem. With your fabric being a knit the raw edges tend to roll up anyway and it doesn’t fray so skip this step if you’d like!


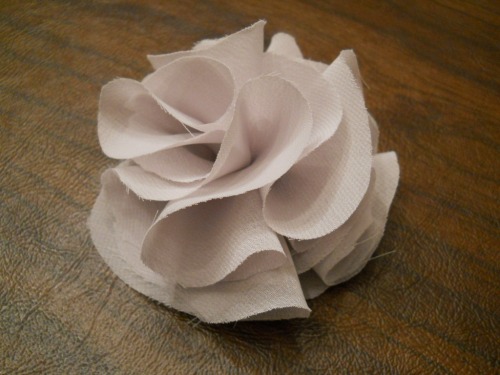
And the scarf wouldn’t be complete with out a little flower pin.


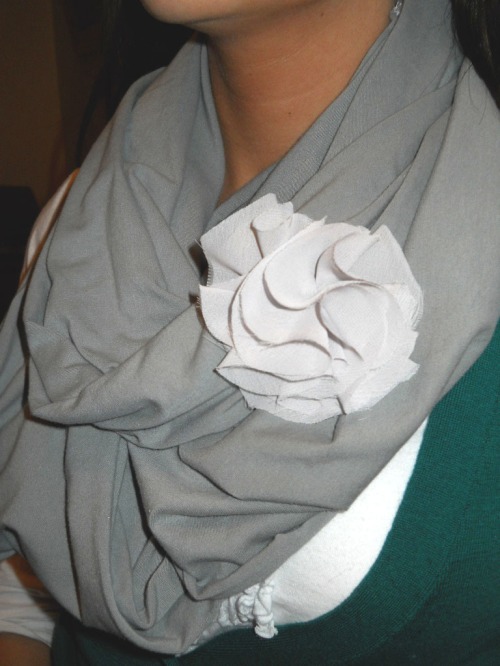
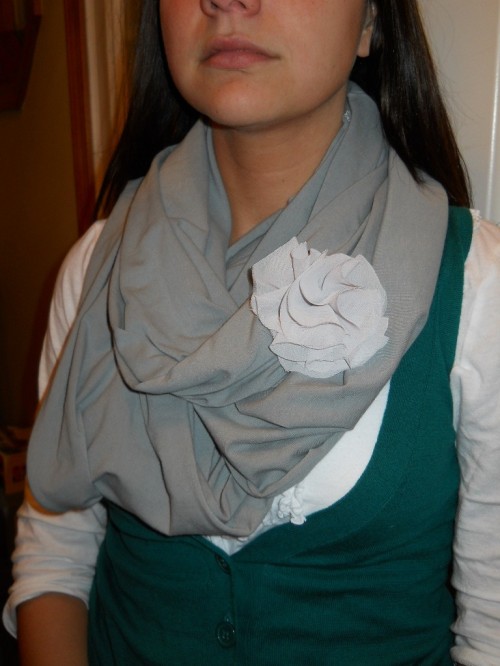
Here’s the scarf on my sister….wrapped around her neck, twice, with an added flower 🙂


I’m Linking up:

Be Different Act Normal

Tater Tots & Jello

A Little Lovely


Blog surfing

I love stumbling upon something fantastic. Through some of my morning blog surfing rituals I came across a wonderful tutorial! I have a strong love for Ray & Charles Eames and this coat rack was inspired by them!  Check out the tutorial:


Thompson Family-Life


Cute? I think so!


Eating is Yummy


Like I said in my last post, we celebrated Christmas over Thanksgiving this year and we made it a “Homemade Christmas.”  Us kids swapped names so we’d know who we’d be making the gift for. I was given my sister-in-law! I racked my brain trying to figure out what to make her. I thought about a re-useable grocery bag since I know she loves them but I knew she probably already had a few. So my next idea was place mats!


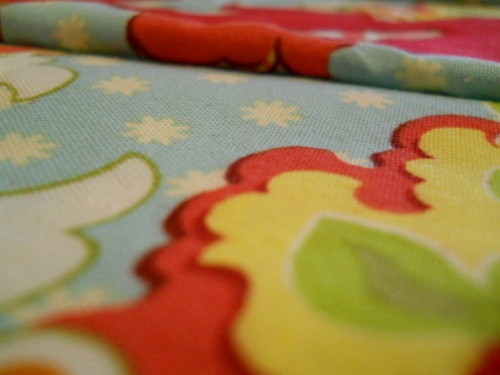
I didn’t want to make any old boring kind of place mat but a fun and colorful one with some vintage flare. I recently found a great quilting shop nearby and I searched for fabric designers like Amy Butler and Heather Baily. My heart fell in love with every type of fabric I found there. It took me a while to figure out which fabric that would scream my SIL’s name but I decided on this lovely pattern:


Free Spirit with Heather Baily 


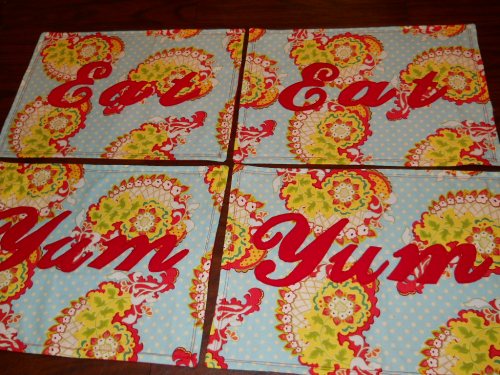
“EAT” & “YUM” PLACE MATS


what you’ll need:


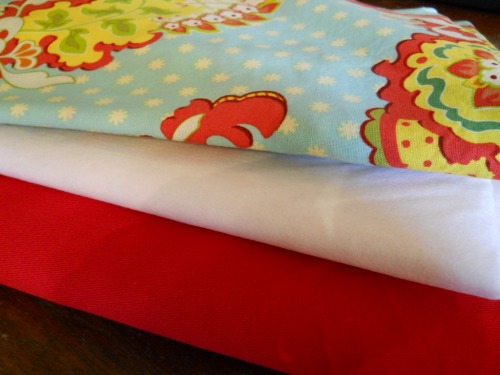
* A yard of both a pattern top fabric and a contrasting color fabric for the bottom

* Roughly 2 yards of light weight fusible interfacing

* Coordinating thread

* Pre-wash fabric

* Seam allowance : 1/4″

* This makes 4 place mats

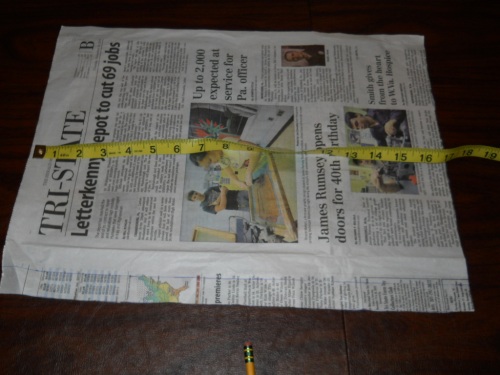
Make a pattern out of newspaper of the size of place mats you’d like.


Cut out (4) 17″ x 13″ pieces of your top fabric

Cut out (4) 17″ x 13″ pieces of your contrasting fabric

Cut out (4) 17″ x 13″  pieces of interfacing

(sizes can vary)

 Lay aside once all pieces are cut.


LETTERS:

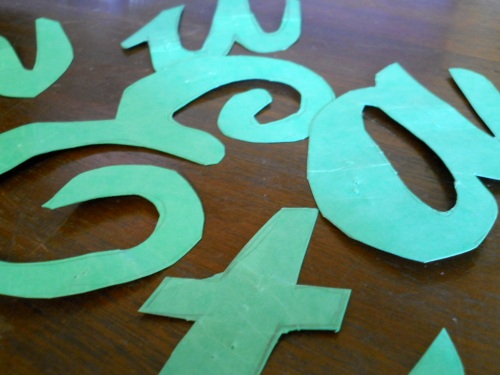
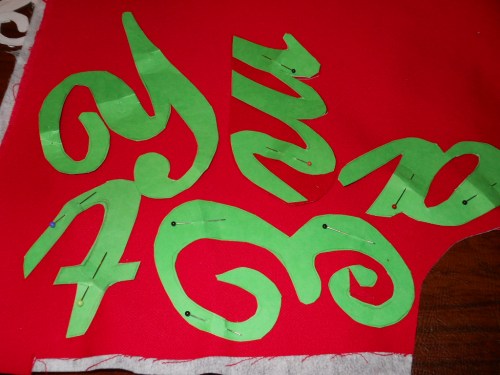
I started off by finding a font I liked using Microsoft Word. I traced the letters on paper and then transferred them to a sturdy folder.

Once I traced them to the folder I cut them out and this became my pattern for the letters.


When you have your letters cut out put them aside.


Take your left over interfacing and the contrasting fabric and iron the two of them together. This will give more weight to the letters.


Once you are done with ironing take your letters and start pinning them to the contrasting fabric.

 You will need to cut out each word (eat & yum) twice.


Depending on how ornate your letters are, you may want to take a deep breath before you start cutting. My hand was completely sore when I was done and I only cut out 12 letters total. I’m a wuss.


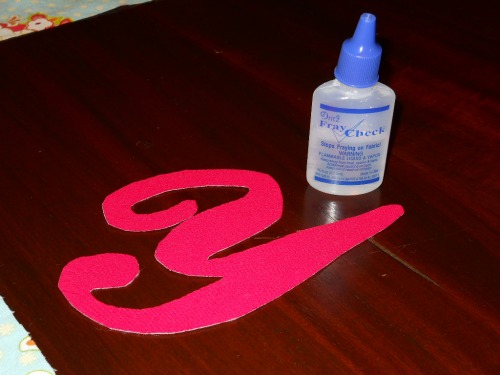
I then used fray check around the edges. Looking back and depending on the type of stitch you use you may be able to skip this.


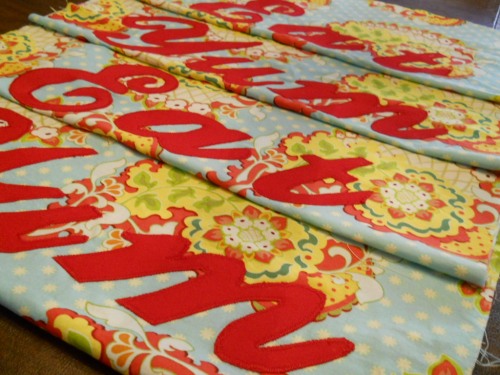
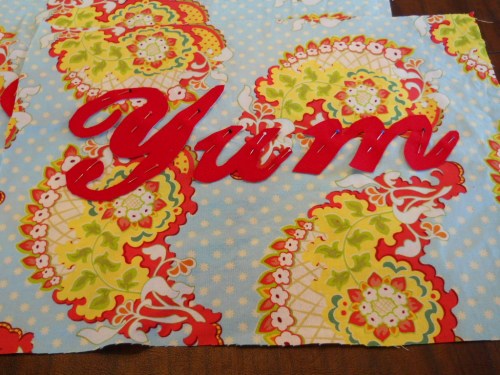
Position your letters and start pinning them to your top fabric in preperation to start stitching them in place.


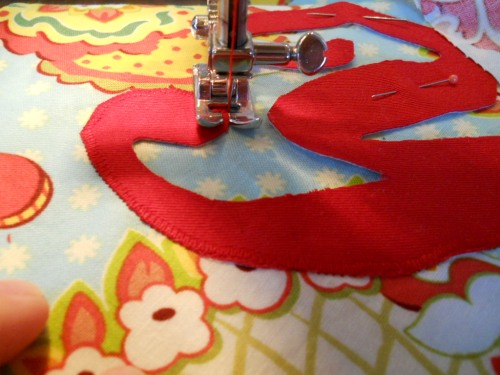
Take your fabric to your sewing machine and use an applique stitch. This was my first time doing this and it was a success!! It’s basically a zig-zag stitch with a short stitch length.


Go around the edge of the letter to as use that as your guide. Take your time because you’ll need to constantly twist and turn your fabric.


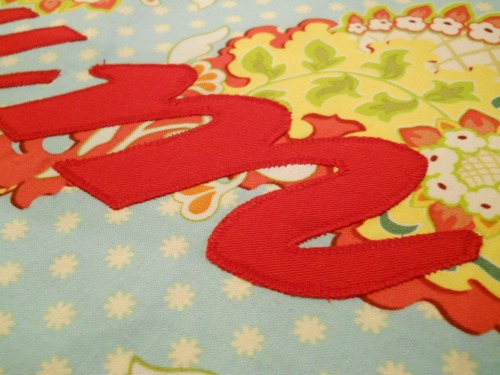
Here it is!


It looks fantastic!

Do this to the remaining letters.


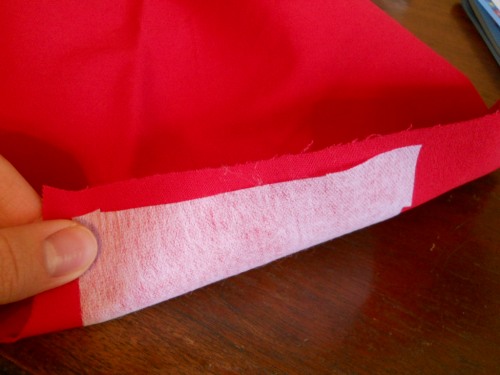
When that is complete you can start on ironing the (4) 17″ x 13″ fusible interfacing to the wrong side of the contrasting fabric.

Read the directions on the interfacing as it will tell you what temperature to use and if you use steam. 

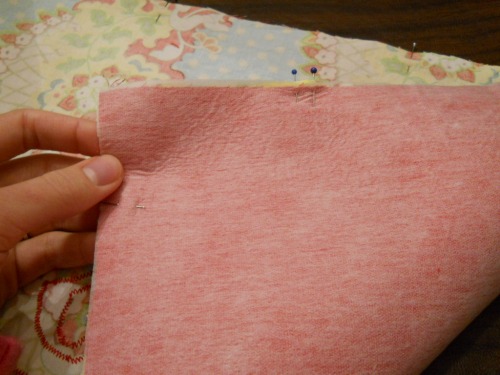
After that you can pin the right sides together of both top patterned and the bottom contrasting fabric together.


Sew along the edges (1/4″) and leave an opening so you can turn the place mat right side out.


Cut out the corners so when its right side out the corners will have a nice point to it.


Do a hidden stitch to close up the hole in which you used to turn the fabric. (no picture) 


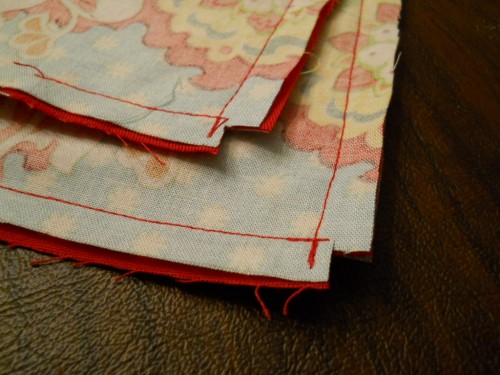
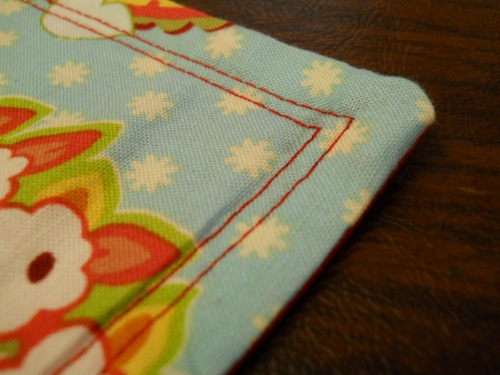
I added a double top stitch around the edges for a decorative touch. 


And you’re done!


The lighting and picture is bad…but you get the idea 🙂


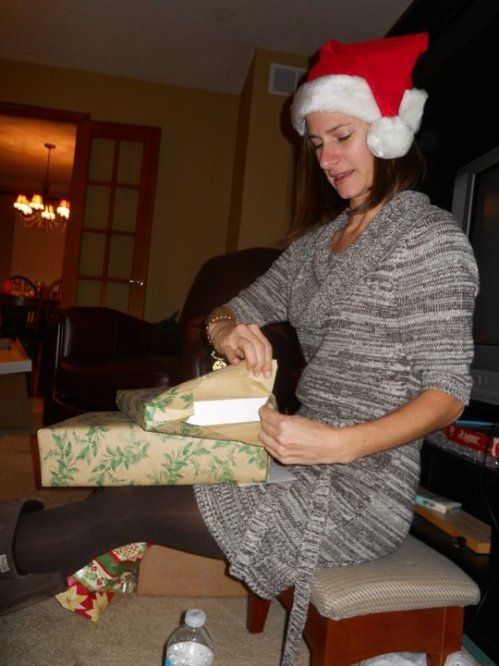
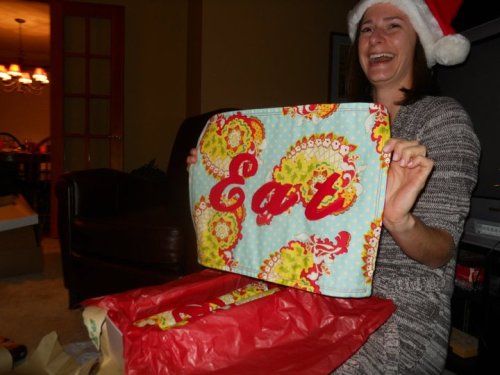
Here’s my sister-in-law unwrapping her new gift!


Yay! I think she liked them!!


I’m linking up to:

I Heart Nap Time

Sumo’s Sweet Stuff

 Making the World Cuter

Craft-O-Maniac

Get Your Craft On

Saturday Mornings

A Thankful Christmas

This Christmas my family and I are doing homemade gifts for each other. We’re also celebrating Christmas over Thanksgiving, thus a “thankful Christmas!” My husband and I will be traveling back to Indiana in just a few days and until then I’m staying busy finishing up my gifts. Did I procrastinate a bit? Sure! But most people say they do their best work when they procrastinate and I guess I’m one of those people too 🙂

I can’t wait to share my projects! I’m super excited about one of them in particular!

See ya soon!

The French Knot


In highschool, I took a sewing class my senior year. I loved it! I made a hideous bandana style tank top/ halter, a button down shirt out of ugly sea-foam green fabric and (the one thing I still have and use) a pin cushion with an attached scrap bag. Over the summer I went to our local fabric shop and ran into my old sewing teacher. I told her I started sewing more and she was thrilled.

One thing I remembered learning from her was how to make a french knot. All it is a fancy way to tie a knot at the of the thread but it was my enemy. I’ve tried to remember for the longest time and I’ve had no luck. I picked up some sewing/craft books at the library and a few had directions on how to make it but it seemed like I was just reading a foreign language. It didn’t make sense. Finally, the other night, I was pretty darn determined to figure it out. I would not take “no” for an answer and ya know what?! I did it!


1. Thread your needle like you would normally do.


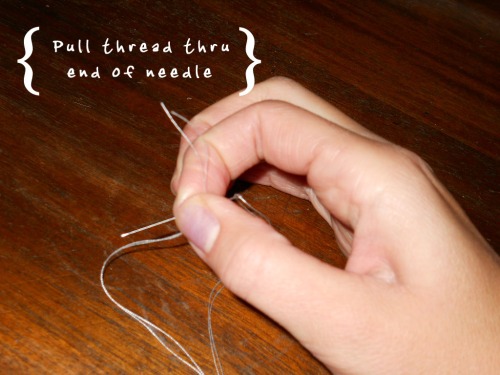
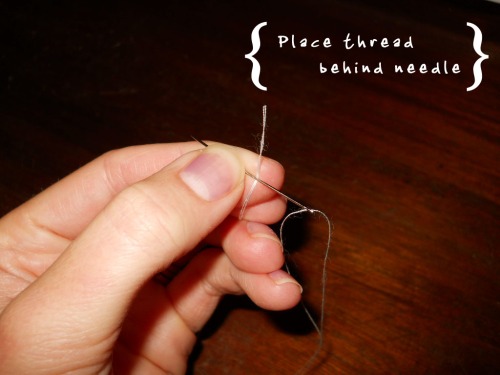
2. Then take the ends of the tread and place them behind the needle with a little extra left on top. Shown above.


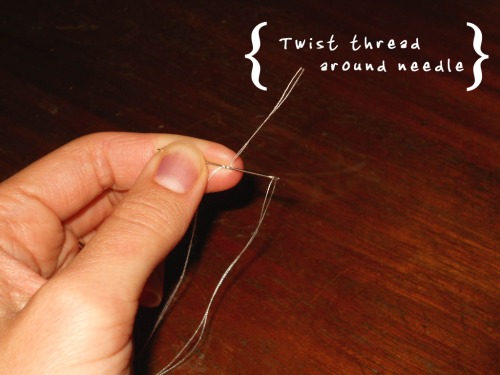
3. Once you have the thread in place you are going to wrap the extra thread around the needle 2-3 times. This will create the knot.


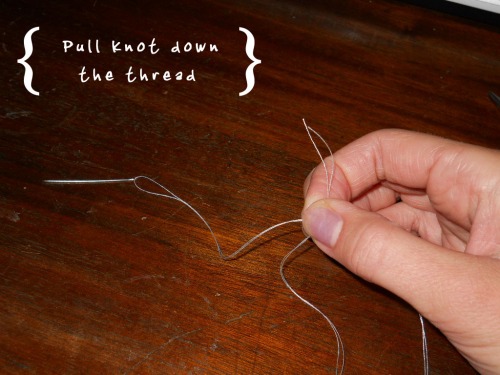
4. Hold the thread in place, you might want to switch hands, and then pull the twisted thread (the knot) thru the back-end of the needle.


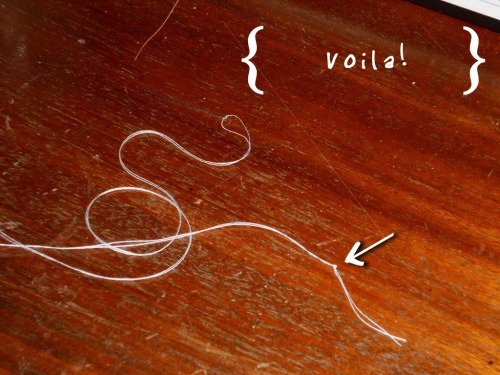
5. Continue to pull the knot down to the end of  the thread until it can’t move anymore.


6. You just created a french knot!


Even though a regular old knot would completely work it’s still nice to know how to make different variations!


Hopefully the directions are clear 🙂


Re-Purposing Part I

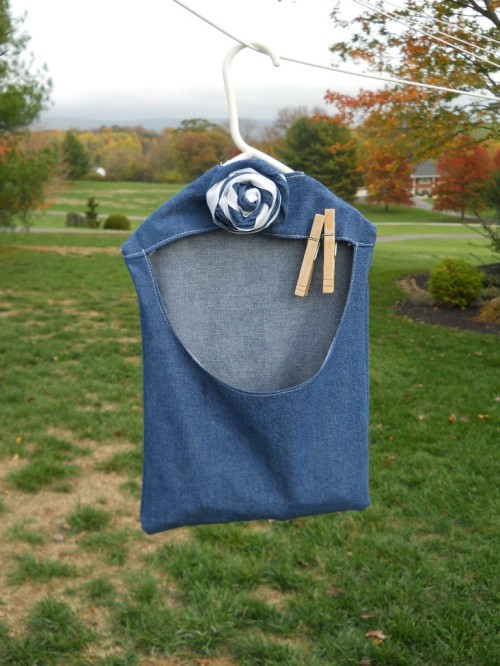
 Who doesn’t love their damp clothes to dry outside in the middle of the summer sun or the autumn breeze? I do and so does my mother-in-law! Right as we moved out east one of the first things she asked me to do was to make a new clothes pin bag. The one she had was worn thin and was years old. Another task she asked of me was to help rummage through her closet and get rid of old clothes. She got rid a lot of old teacher sweaters, you know, the kind with holiday appliques all over it…that just scream “teacher?”

She knew she needed to give them away and I guess I was just the person to help. 🙂

Clothes pin bags and teacher sweaters have a correlation.

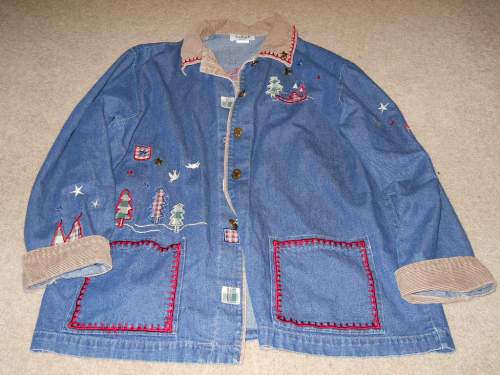
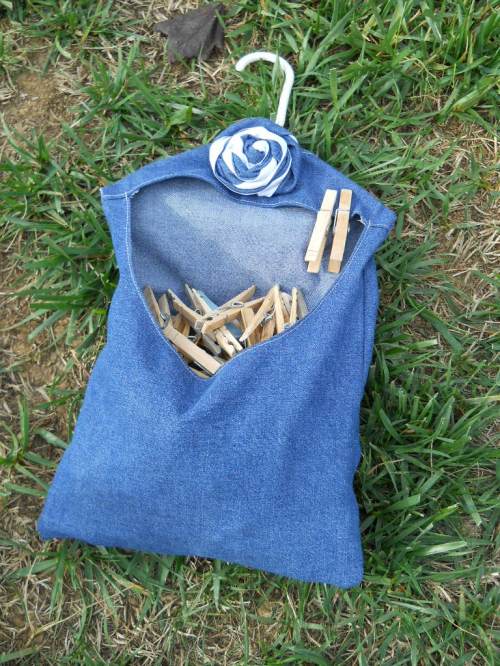
Let me continue, I found an old jean jacket that screamed “teacher” from my MIL closet. She mentioned that this would be good material for her new clothes pin bag. I agreed.

 We’re re-purposing here, people.


Isn’t it great!?


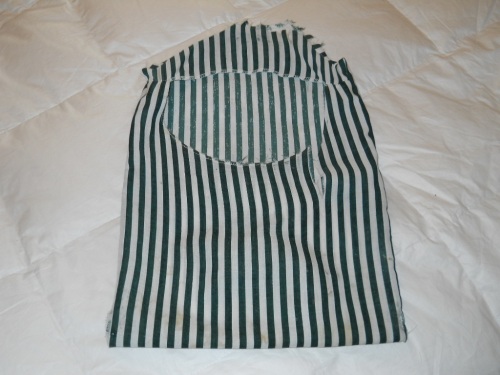
Here is what the old clothes pin bag looked like.


A great way to figure out how something is made is by taking it apart! That’s just what I did. I created a pattern from the old bag and used the back side of the jean jacket for the fabric.


I wanted to make a more unique flower but this one was quick and easy!