Feeds:
Posts
Comments

Archive for the ‘Tutorials’ Category

This should be called Part II of my Homemade Christmas ideas. Along with the place mats I wanted to make something extra and what’s better than a scarf!

I think almost every girl loves a new scarf to help accessorize their outfits. I do! I bought some grey knit fabric on clearance back in the summer and I still hadn’t used it for anything. I thought the light weight comfy material would work well turned into a scarf. I searched all over in the craft blog world and didn’t come up with much. Don’t get me wrong, there are some pretty fantastic scarf ideas out there but nothing that jumped out at me for my sister-in-law.


Enter:


This was a very simple project.


What you’ll need:

* 1 yard fabric cut in (2) pieces, lengthwise

* Coordinating thread

….simple!


I don’t have specific step-by-step directions and I didn’t take exact measurements. This project is so simple I’ll just give you a run of how to do it.


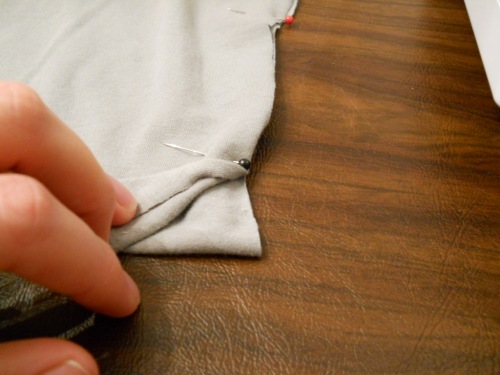
Pin the (2) pieces together that you just cut and sew at one end, creating your typical scarf when you drape it around your neck.  


Put it on and find a good length for yourself (the scarf should meet your mid to upper thighs). I had to cut roughly 20″ off from each end making the scarf roughly 60+ inches long. Approx. 30+ inches for each rectangle.

Exact measurements? Nah…you make it the length you think would fit you best.

When you find the length the suits you best sew the other end together creating a big loop. You want the scarf long enough to wrap around your neck a couple of times.

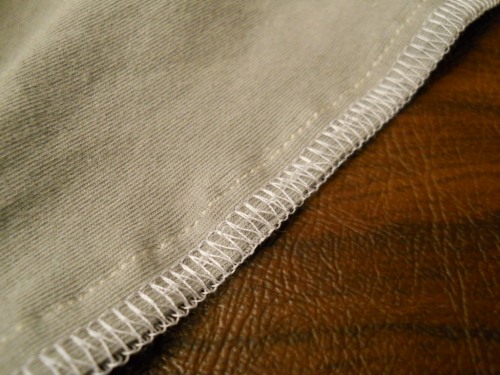
If you have a serger you and finish off the seams like this:


No serger? No problem. With your fabric being a knit the raw edges tend to roll up anyway and it doesn’t fray so skip this step if you’d like!


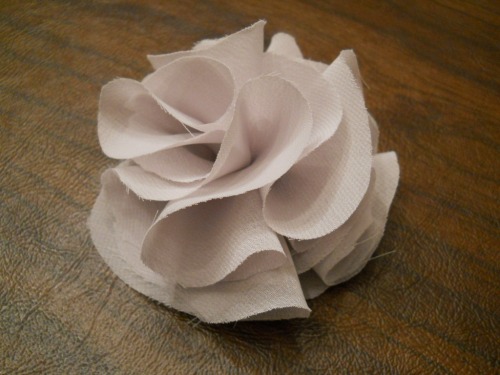
And the scarf wouldn’t be complete with out a little flower pin.


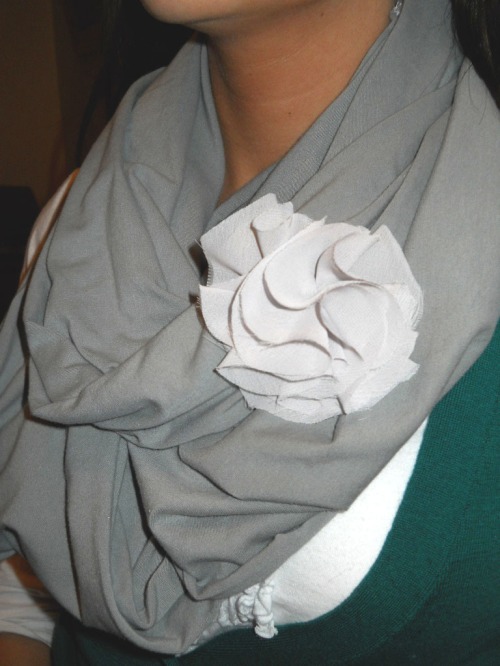
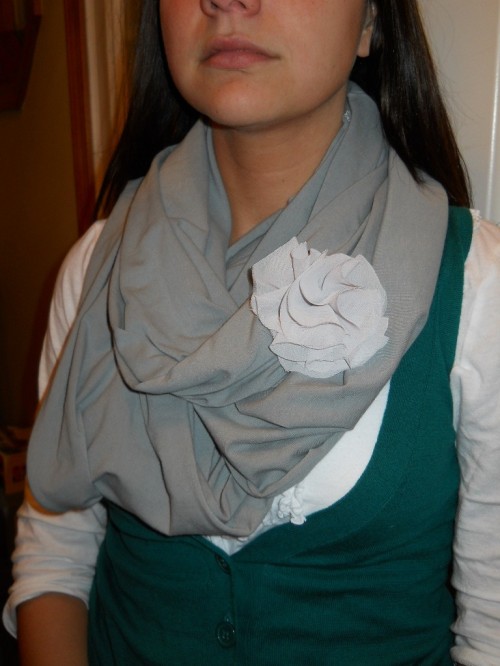
Here’s the scarf on my sister….wrapped around her neck, twice, with an added flower 🙂


I’m Linking up:

Be Different Act Normal

Tater Tots & Jello

A Little Lovely


Read Full Post »


Like I said in my last post, we celebrated Christmas over Thanksgiving this year and we made it a “Homemade Christmas.”  Us kids swapped names so we’d know who we’d be making the gift for. I was given my sister-in-law! I racked my brain trying to figure out what to make her. I thought about a re-useable grocery bag since I know she loves them but I knew she probably already had a few. So my next idea was place mats!


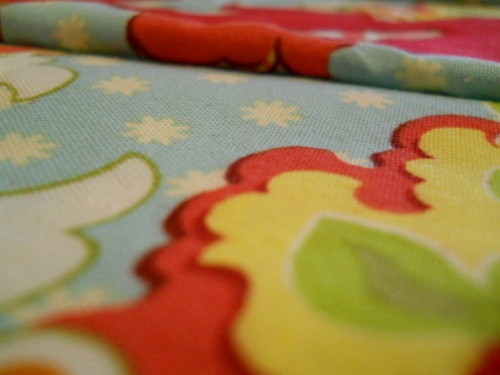
I didn’t want to make any old boring kind of place mat but a fun and colorful one with some vintage flare. I recently found a great quilting shop nearby and I searched for fabric designers like Amy Butler and Heather Baily. My heart fell in love with every type of fabric I found there. It took me a while to figure out which fabric that would scream my SIL’s name but I decided on this lovely pattern:


Free Spirit with Heather Baily 


“EAT” & “YUM” PLACE MATS


what you’ll need:


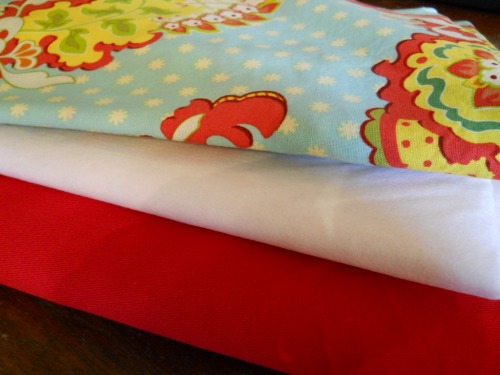
* A yard of both a pattern top fabric and a contrasting color fabric for the bottom

* Roughly 2 yards of light weight fusible interfacing

* Coordinating thread

* Pre-wash fabric

* Seam allowance : 1/4″

* This makes 4 place mats

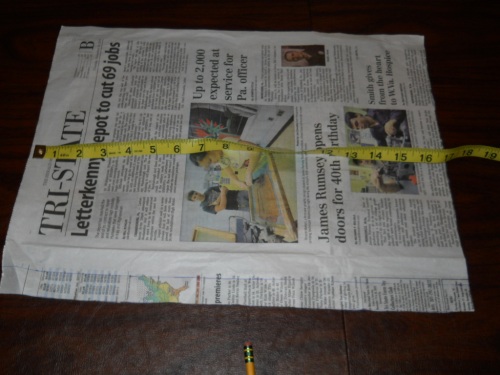
Make a pattern out of newspaper of the size of place mats you’d like.


Cut out (4) 17″ x 13″ pieces of your top fabric

Cut out (4) 17″ x 13″ pieces of your contrasting fabric

Cut out (4) 17″ x 13″  pieces of interfacing

(sizes can vary)

 Lay aside once all pieces are cut.


LETTERS:

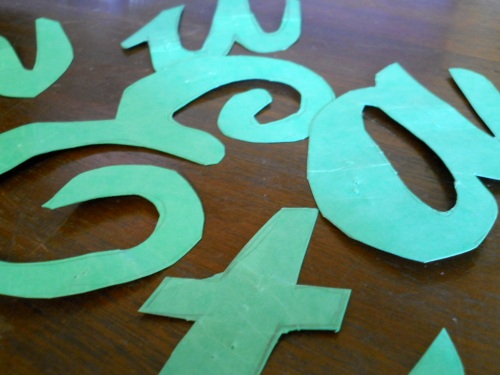
I started off by finding a font I liked using Microsoft Word. I traced the letters on paper and then transferred them to a sturdy folder.

Once I traced them to the folder I cut them out and this became my pattern for the letters.


When you have your letters cut out put them aside.


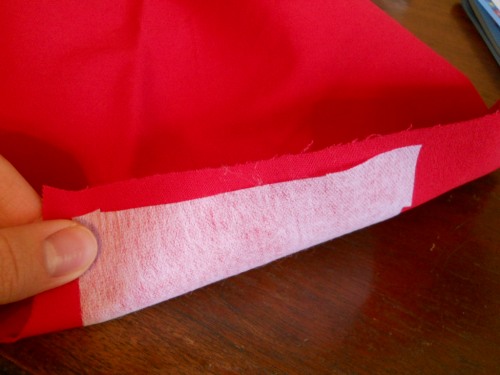
Take your left over interfacing and the contrasting fabric and iron the two of them together. This will give more weight to the letters.


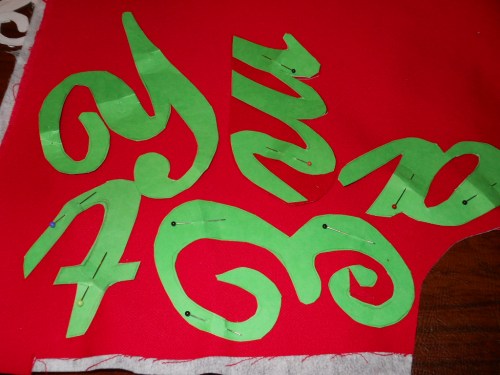
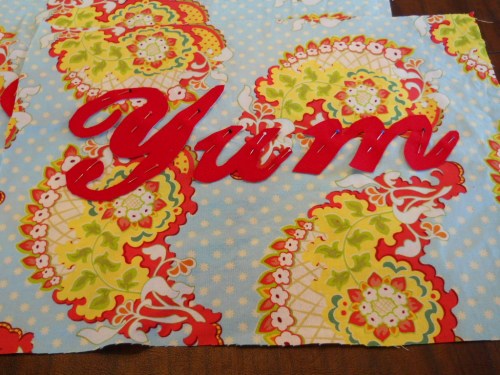
Once you are done with ironing take your letters and start pinning them to the contrasting fabric.

 You will need to cut out each word (eat & yum) twice.


Depending on how ornate your letters are, you may want to take a deep breath before you start cutting. My hand was completely sore when I was done and I only cut out 12 letters total. I’m a wuss.


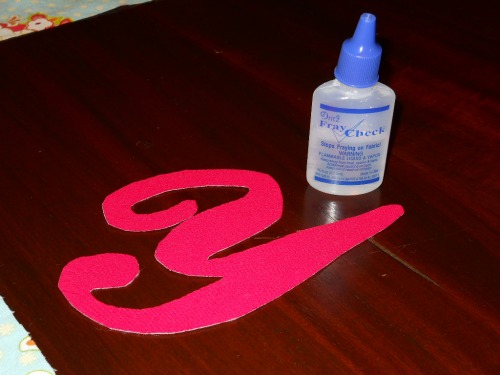
I then used fray check around the edges. Looking back and depending on the type of stitch you use you may be able to skip this.


Position your letters and start pinning them to your top fabric in preperation to start stitching them in place.


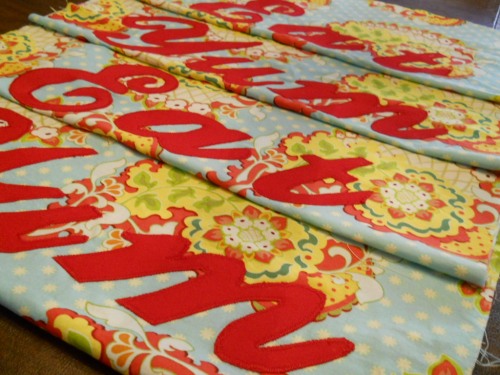
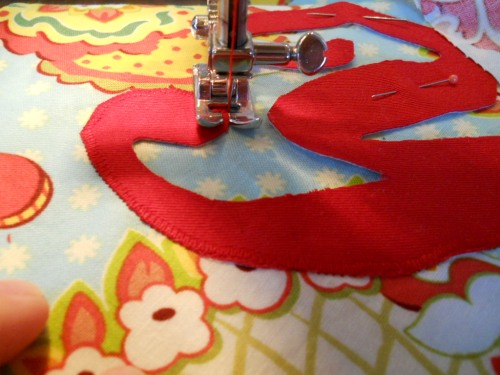
Take your fabric to your sewing machine and use an applique stitch. This was my first time doing this and it was a success!! It’s basically a zig-zag stitch with a short stitch length.


Go around the edge of the letter to as use that as your guide. Take your time because you’ll need to constantly twist and turn your fabric.


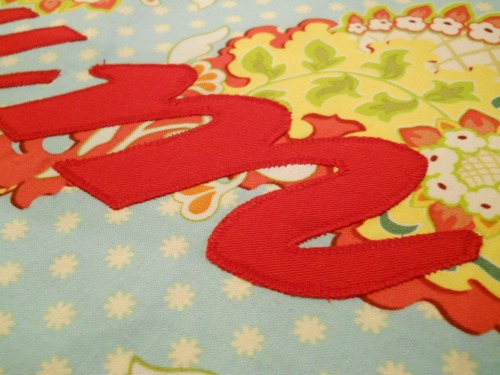
Here it is!


It looks fantastic!

Do this to the remaining letters.


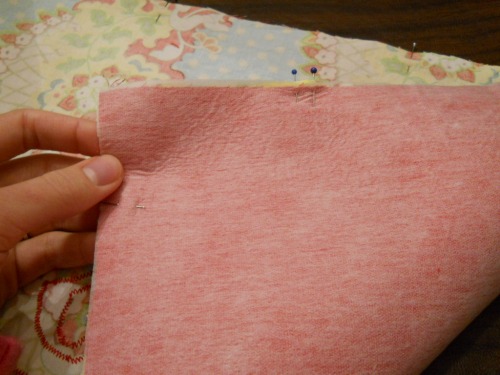
When that is complete you can start on ironing the (4) 17″ x 13″ fusible interfacing to the wrong side of the contrasting fabric.

Read the directions on the interfacing as it will tell you what temperature to use and if you use steam. 

After that you can pin the right sides together of both top patterned and the bottom contrasting fabric together.


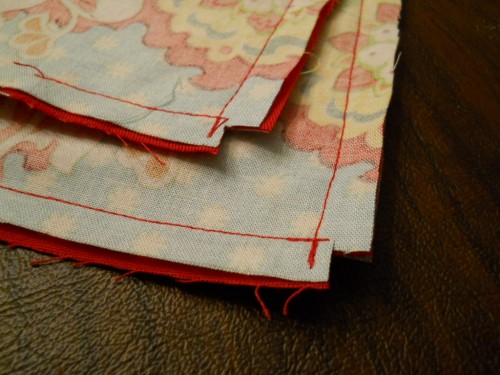
Sew along the edges (1/4″) and leave an opening so you can turn the place mat right side out.


Cut out the corners so when its right side out the corners will have a nice point to it.


Do a hidden stitch to close up the hole in which you used to turn the fabric. (no picture) 


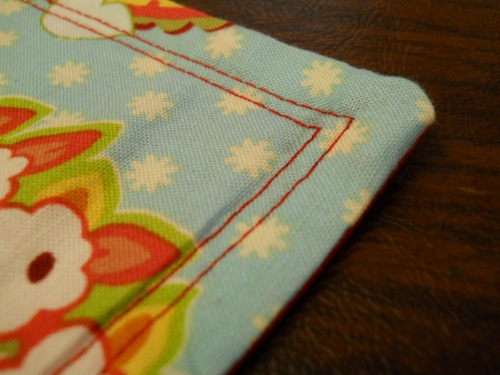
I added a double top stitch around the edges for a decorative touch. 


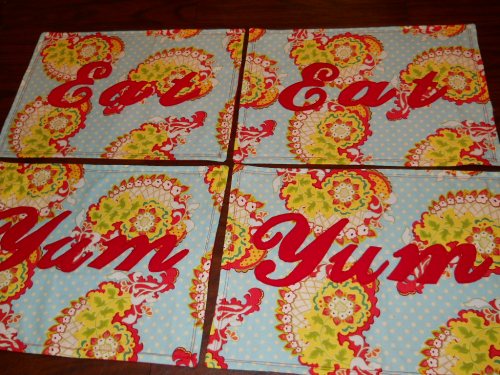
And you’re done!


The lighting and picture is bad…but you get the idea 🙂


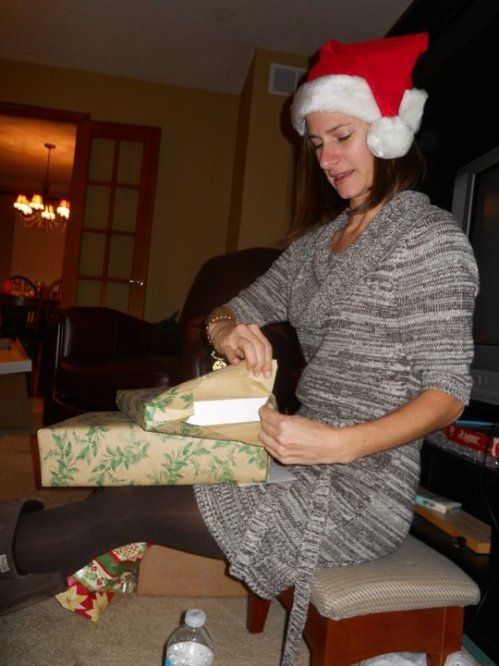
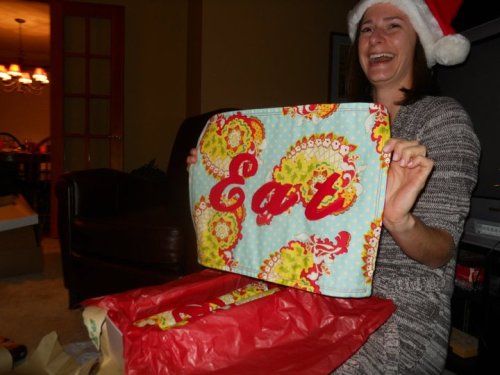
Here’s my sister-in-law unwrapping her new gift!


Yay! I think she liked them!!


I’m linking up to:

I Heart Nap Time

Sumo’s Sweet Stuff

 Making the World Cuter

Craft-O-Maniac

Get Your Craft On

Saturday Mornings

Read Full Post »

Rosette Pin: Tutorial

You’ll see these little pins all over in the craft blog world. Here’s the inside scoop on how to make the Rosette.


Turn it into a pin and you can pretty much do anything with it!


To start of you need to cut a piece of fabric that is about 4″ wide.

It can be whatever length you want. The longer it is, the bigger your flower.


You also need to cut out a piece of felt about 3″ in diameter or so.


If you were making this with a thinner piece of fabric you would want to tie a knot at the end.

I was using thicker fabric here so I just kind of folded the end up. This will act as the center of your flower. I added a dollop of hot glue to keep it in place.


Once you have that you just want to keep wrapping and twisting the fabric around the knot, or center of flower.


When you have the rosette all rolled up, hold it with one hand while you use your hot glue gun to add glue to your piece of felt.

I just made a circle with the glue.


Quickly add the rosette to your felt and let dry.


Here ya go! A cute little new rosette!


ENJOY!


Read Full Post »

The Man Bag: Tutorial


The Man Bag


Alright folk, as I said before, my husband wanted to take part in all the fun and he wanted me to make him some kind of a man bag. I was inspired by MADE and the Hobo Sack she created for her kids. My husband caught a glimpse of the post and then both our wheels started turning. He helped design the bag and even went to fabric store with me to pick out the kind of fabric he’d like! He’s such a trooper!

Here’s the fabric we came out with:


You can check out the original tutorial here.

What you’ll need:

  • Fabric: 1.5 yards of desired fabric for the outside of the bag. I chose a nice durable corduroy and 1.5 yards of desired fabric for the inside of the bag. The hubs chose what almost felt like an outdoor fabric. It was heavy and seemed durable.


  • Strap: About 3 yards of a canvas like belting material. I think this is on the higher side of how much you’ll need. I had to go back to the store to buy more equalling out to be about 3 yards total.


  • Needle: Make sure you buy a needle that is suitable for heavy fabrics, upholstery, or jeans.  I made my sister a dress out of some thicker fabric and my needles (for lightweight to medium fabrics) kept breaking. I went through 3 different needles sewing that dress. Frustrating.


  • 2 buttons


  • Leather like string to wrap around the buttons to secure the flap to the bag.


  • Seam allowance: 1/2″ all around


I cut out a pattern from some file folders. I based my sizing off Dana’s Hobo Sack. I knew I wanted mine a bit bigger so my dimensions for the bag were 14″ wide x 16″ tall. This does not include the 1.5″ cut out at the bottom of the patter. If you included the bottom measurements the total height would then be 17.5″ tall.


Make sure you make the cut outs at the bottom of the bag. Mine was 1.5″ square. Click here for more details.

My dimensions for the flap were 14″ wide x 8″ tall. I also rounded out the edges of the flap. 


Using the patterns above cut out two pieces for each fabric choice.


Pin wrong sides together. You want the stripe fabric to be the liner so that’s why to pin them wrong sides together instead of right sides together.


Fold up the corner pieces you cut out and stitch with the liner fabric on the outside. Check out the MADE tutorial for more specifics.


I wanted to add a  tag (label wannabe) to my hubs bag to make it look more like it was professionally made.  I’d love to get actual labels made but that will have to wait. They cost like $200. That’s on my wish list. 🙂

To make a little tag just cut out an 1″ x 3″ piece of fabric. I chose the lining fabric since it would contrast with the outside of the bag. Fold over the edges to the middle of the fabric and sew down each side.


Once you sew the corners together (do this to both pieces), place one piece of the fabric  inside the other. Make sure you place your tag where you want it so you can stitch that in place when you sew the front and back together. (See the Hobo Sack tutorial for more info.)

Sew a 1/2″ seam all the way around and curve with the fabric when you hit the bottom around the corners. This is when the heavy-duty needle comes in handy!

Next, you’ll want to create a casing if you choose to do the drawstring closer. (See the Hobo Sack tutorial.)

I created the casing by folding over about  1.5″ of fabric so the brown corduroy is on the outside. (Sorry no picture, I must have been on a roll sewing b/c I missed a couple of pictures from here to how to add the flap!) lol


When that is complete use the flap pattern to cut out a brown piece and a stripe piece. Pin and sew them with right sides together. Make sure to keep an opening so that you can turn the flap right side out.


After you turn the flap right side out do a double stitch all the way around it. This helps with closing the opening you kept in order to turn the flap right side out without having to do a hidden stitch to close it. Doing a double stitch always makes things more durable.


Like I said above, I must have got carried away because I forgot to take a picture of me pinning the flap to the bag.

Here’s what you’ll need to do: 

You want to take the top of the flap (the straight edge)  and pin it to the back of the bag about an inch or so down. It will roughly be sewn right around where your stitches were from sewing the casing. This depends on how much you want the flap to hang down in the front. My husband wanted a longer flap in the front so that’s why I only stitched it in the back about an 1.5″ down.  If you want a shorter flap then pin it down furter in the back. Make sure you double stitch this also for added durability.


After you sew on the flap, YOU’RE ALMOST DONE! Take your two buttons and place them on your bag where you’d like them.

Sorry for the blurry pictures. I got a new little point and shoot camera and I can’t seem to take consistent pictures with it. Maybe my dear friend Courtney can help me figure it out. 🙂

Here is a blurry picture of what your bag should look like at this point. Don’t mind the straps, we’ll get there next! Notice the little tag label on the left side of the bag.


Buttons: Start from behind the flap and start hand sewing on your button. Weave your needle thru all the holes a few times. I doubled up my thread to make it more sturdy. Do this to both buttons. One on the flap and one on the bag.


Now onto the STRAP!

I must preface this and say that you should definitely try to add the straps before you sew the front and back pieces together. I did not do this and it was quite challenging to sew on this canvas strap.

I found that the corduroy fabric wasn’t as stiff as I wanted it to be so I had to come up with an idea to make the back stronger. Adding the strap for the right size for my husband was lots of trial and errors. You’ll have to play with how tight you want the bag to fit around you. My husband is a muscular guy and he wanted the bag to be more on the snug side. So the strap for his bag is about  30″  once you have sewn it down.

You need to start off by pinning one end of the fabric (cut the 3 yards of canvas in half) to the middle of the back of the bag. Take the strap and pin the extra to where is lays flat at the bottom of the bag about 1.5″ from the bottom. Again, you’ll need to try this on for fitting for the exact measurements and how tight or loose you want it.


Once you pin on the first strap sew the top piece on. My piece was sewn onto both the flap and the bag. Sew a square and make an “X” with your thread in the center. For the bottom of the strap just sew straight lines down both sides with about a 1/4″ from the edge. This part was hard and where I injured my poor little thumb. This is also why I think it would be a better idea to 1. not sew when you’re tired and 2. sew the straps on first before you sew the front and back pieces together. If you don’t do that you’ll need to turn the bag inside out and then sew from the inside and maneuver your fabric around.


When you have that complete, cut out 2 pieces of strap from the remaining canvas belting about 12.5″ long with a 45 degree angle. Cut another piece about 11″ long. The 2 12.5″ long pieces will be sewn on vertically about an 1″ from the sides of the bag when laying flat.

Pin the side straps on the side to start creating an open square. Pin the bottom of the side pieces over the bottom strap.

Sew along each strap about a 1/4″ from the sides.


Pin on your last piece that is 11″ long to the top.

Sew down each side.


The square on the back gives the bag support and durability.

Voila! The back and straps are completed!

To add the string to the button just weave it through the bottom side of the button a few times and make a tight knot from the back side.


Start winding your string around the buttons and you’re done!!!!!!


Here’s an inside shot of the bag with a banana picture my husband wanted to add(?). I love that man!  This bag suits him perfectly. He’s a little crazy and funny but can be serious and studious when he needs to be!


The bag is ready to carry with books, water bottles, or long sleeve shirts for the cooler weather that’s coming your way!!

If you end up making the bag, let me know! I’d love to see how it turned out. If some things are not clear in my instructions let me know and I’ll help you out!

Leave a comment and tell me if you like the bag and tutorial!

Watch out over the weekend for a FREE GIVEAWAY to celebrate fall just like Starbucks celebrates fall with Pumpkin Spice Lattes!!!!!!

Peace.

Read Full Post »
Baby Blanket: Tutorial

Who wouldn’t love a cute little baby blanket or a little baby onesie?  Baby clothes are just too darn cute. Recently, a good friend of mine  had a baby shower for her first little baby boy. We grew up together wearing matching clothes, having many sleepovers, and prank calling boys. You know, typical pre-teen shenanigans. We were in each others weddings and I will always consider her a close friend! So when I got the invite to her shower I knew I wanted to take the time to make her something from scratch.

I’ve seen many baby blankets that have ribbion tags on it so I wanted to create my own. Here’s what I came up with:

  • Chose two or more different fabrics. I chose two just to keep it simple.


  • I bought a yard of each fabric but you’ll really only need just a 1/2 yard each. Blanket will be 18″x18″ when completed.


  • I cut out a 19″ square and kept a 1/2″ seam allowance. I ironed the down the 1/2″ all around but there’s no need too. Just use the lines on the sewing machine to help guide you.


  • This will be the back to your blanket.


  • Next, you’ll need (9) 7″ squares. I cut out 5 blue (to match the back) and 4 of the print fabric.


  • Once you lay them all out, take the top 3 squares and pin them (right sides) together keeping a 1/2″ seam allowance.  Do this step with the last 2 rows. Iron open the seams.


  • After you have 3 separate rows sewn together, you can pin each row to the next and stitch. (sorry no picture) Make sure all the seams line up as you sew the rows together! This is what you get when your done:


* We have friends that have their own embroidery company and kindly stitched the baby’s last name on the center square. If I embroidered on my sewing machine I’ll bet you a million bucks it’d look like crap 🙂


If you don’t want to add the tags, skip this step.

  • I cut my ribbon tags about 3″ long. I cut out 6 white ones, 6 red ones, and 8 small skinny blue ones.


  • Turn the top of the blanket right side up and fold the ribbons in half.


  • Match the ribbon tags up with the edge of the fabric where you would like to place them. (some of my tags were cut longer so you will see more ribbon hanging off the edge than the ones I cut at 3″ long).


  • Start sewing about a 1/4″ or less from the edge to stitch all the ribbons in place before you add the back of the blanket.


*This will help so the tags don’t move around as you stitch the front and back together.


  • Once that is done, add the back fabric, mine is the 1st 19″ blue square that I cut out, and pin right sides together and sew around the whole blanket with a 1/2″ seam.


  • Leave a small opening so you can get your hand in there and turn it right side out.


  • Iron everything flat and do a blind stitch to close up the opening.


And this is what you get:


Cute 🙂

Next time I’ll show you the little onesies I made…even cuter!!

Read Full Post »